Entering visit notes in the consult letter form
You can enter the majority of your patient visit notes in the consult letter form. Here, you can enter your notes in the format of a consult letter using the structured fields provided. The majority of your notes are written in the main text area, with your assessment notes entered in the lower aspect of the window.
Tip: To facilitate your consult letters, you can also use letter templates (see Using consult letter templates), structured exam templates (see Using structured exam templates), and auto-replace words (see Using auto-replace text).
Steps
|
2.
|
In the Referral Reason field, enter a short description of the primary visit reason or choose one from the list. |
|
3.
|
In the main text area, enter your visit notes in the format of a consult letter. (For example, start your notes with a statement such as “Thank you for referring your patient to our clinic regarding...”.) |
|
4.
|
Enter the patient’s vitals and measurements. |
To ensure you can graph and report on important patient vitals and other measurements, always enter this information into the appropriate fields in the EXAM area. Avoid free-typing vitals and measurements into the OBJECTIVE area.
Tip: If your front end staff have already entered vitals and measurements for the patient, the values display in the General Exam form.
|
a)
|
In the Length Units, Weight Units, and Temp areas, select the appropriate units of measurement. |
|
b)
|
To graph a vital or measurement, beside the value you want to graph, click . |
Tip: For pediatric patients (under the age of 19yrs), if you graph weight or height, the EMR displays the pediatric growth charts.
|
c)
|
When you are done, click Close . |
|
5.
|
In the Assessment area, enter the patient’s problem(s): |
|
a)
|
In the Search field, enter all or part of a problem name or ICD9 diagnosis code. |
|
b)
|
Press Enter. The EMR displays a list of matching problems and codes. |
|
c)
|
In the results list, click a problem. |
|
d)
|
In the Qualifier field, enter the position (for example, right, left, front) or other qualifier information about the problem, or in the list, click a qualifier. This list can be customized (see Managing the qualifier list for assessment entries). |
|
e)
|
Click Add to Assessment. The problem appears in the List field of the Assessment area. |
Tip:
Adding an Assessment diagnosis to a patient’s problem list
If you want to effectively identify, track, and manage patients who have specific problems, always add important problems to a patient’s problem list.
If the diagnosis is not on the patient’s problem list already, you can add the diagnosis to the patient’s problem list from the SOAP form itself. To the right of the Assessment area, click Add to Problem list.
|
f)
|
To add another diagnosis, repeat the above steps. |
|
6.
|
If a selected ICD 9 description is not appropriate for your written impression, you can edit the Assessment description. To edit a selected assessment: |
|
a)
|
In the List field, click the assessment you want to edit. The EMR displays a list of action options to the right. |
|
b)
|
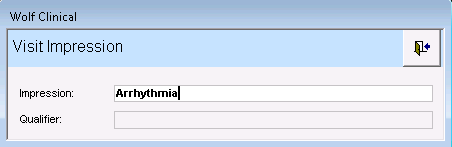
Click Edit. The Visit Impression window opens. |
|
c)
|
In the Impression field, edit the description. |
|
d)
|
When you are done, click . |
|
7.
|
In the Assessment area, in the text area, type any additional assessment notes. |
|
8.
|
To populate the patient’s bill at this time: |
|
a)
|
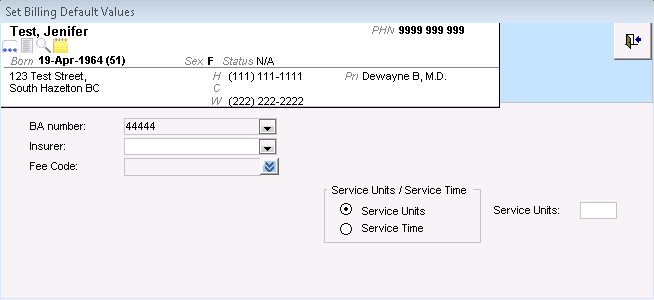
Click Set Billing defaults. The EMR displays the Set Billing Default Values window. |
|
b)
|
In the Insurer list, click the insurer, individual, or company you want to bill. |
|
c)
|
In the Fee Code list, click a fee code that applies to the visit. |
Note: You can enter only one service code here. If you want to add additional service codes, you must add them in the billing window. See Creating Medical Services Plan (MSP) bills.
|
d)
|
In the Service Units/Service Time area, complete one of the following actions: |
To enter the number of service units, select Service Units, and then enter a number in the Service Units field.
To enter a service time, select Service time, and then enter a start and end time in the Service Start/End time fields.
|
a)
|
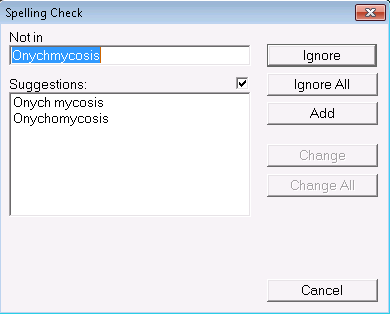
On any text area (for example, the SUBJECTIVE text area), right-click. |
|
b)
|
Click Check Spelling. If unidentified words are recognized, the Spelling Check window opens. |
|
10.
|
Perform one or more of the following actions: |
To print or fax the consult letter, see Printing and faxing consult letters.
To save the form, mark the visit as complete, and convert the form to read-only, click Lock Current Visit Record .
To add more information to the consult letter form at a later time, click Close Visit Record . The EMR saves your visit notes, but leaves the visit status as Incomplete. The consult letter form remains editable, and displays on your Incomplete Visit Notes list.
|
11.
|
When prompted to lock the form, click Yes to mark it as complete. |
|
12.
|
No matter which closing option you choose, you are prompted to indicate if you want to lock the visit note. A visit note is never truly “locked”, you can always edit a locked note if needed. |
|
13.
|
Click Lock to save your notes. |