Creating practice search rules
Create a practice search rule to flag patients that meet certain parameters. After rules are created and made active, they run on a nightly basis. You can view the results from (see Viewing and managing patient rule matches).
Steps
| 1. | From the Wolf EMR home page, click Practice Search |
| 2. | Perform one of the following actions: |
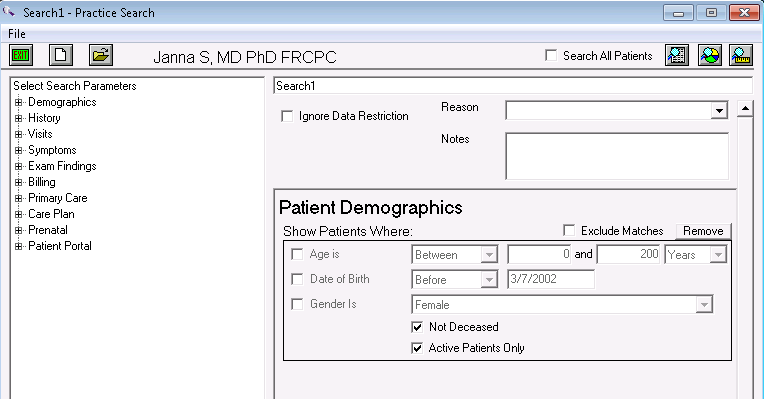
To create a new rule, produce a practice search that defines the parameters patients must meet to be flagged by the rule.
To use a pre-configured rule, click Open a Previously Saved Search![]() . The Open Saved Search or Rule window opens, with a list of searches and rules. Click the rule you want to use.
. The Open Saved Search or Rule window opens, with a list of searches and rules. Click the rule you want to use.
Note: Wolf EMR comes with a number of pre-configured rules for chronic disease and complex care management. In your list of practice searches, you can easily identify these rules, as they start with CDM (such as CDM DM Billing Incomplete), or CC (such as CC H250 DM/CVD No Billing).
You may have to modify the parameters to match your clinic’s workflow.
Modifying pre-configured rules
You can modify the search parameters set for pre-configured rules as needed. To modify a pre-configured rule:
| 1. | In the Open Saved Search or Rule window, click the rule. |
| 2. | At the bottom of the window, click Open Selected. The Practice Search window for the rule opens. |
| 3. | Enter, remove, or modify parameters as needed. |
| 4. | In the Save Current Search As window (if you created a new rule) or in the Open Saved Search or Rule window (if you are using a pre-configured rule), using the following table, enter or modify the rule’s properties. |
| Field | Description | |||||||||||||||
|---|---|---|---|---|---|---|---|---|---|---|---|---|---|---|---|---|
|
Save Item as Rule |
Select this check box to make the practice search a rule. |
|||||||||||||||
|
Text to display for patients who match this rule |
Type the text to appear when a patient is flagged by this rule. This text appears as the Rule Text within the Rule Matches window, available from the WorkDesk. See Ensure that the text is descriptive of the required action to take. |
|||||||||||||||
|
Rule Priority |
Select a priority for the rule. The range is between 1 and 9, with 1 being the highest priority and 5 being the default. When you view the rule matches, you can filter the list based on priority level. For example, you can choose to view only Priority 1 rules. |
|||||||||||||||
|
Default Action |
Specify the default action for this rule, which will be pre-selected in the Rule Matches window. |
|||||||||||||||
|
Security Group |
To assign a specific role or team to address the rule matches, select a role or team. You can choose one only if a security group has been created for the role or team (see Creating security groups). Tip: If a group of billing staff manage CDM and/or complex care billing, create a specific security group for these staff members (such as a security group called “Billing”). When you create a CDM billing rule, you can then assign “Billing” as the role for the rule. When the billing staff view the clinic’s rule matches, they can filter the list to display only rule matches assigned to “Billing”. |
|||||||||||||||
|
Scheduled to run on |
Displays the time and frequency the EMR will search for and identify patients who match the rule. You cannot edit information displayed in this field. All rules run nightly. |
|||||||||||||||
|
Active |
Select to activate the rule. The rule will execute on a nightly basis until you clear this check box. |
|||||||||||||||
|
Portal Notifications (This area appears only if the patient portal is enabled for your clinic) |
If you use the patient portal, and you want patients who match the rule to receive a notification on the patient portal:
|
| 6. | Perform one of the following actions: |
If you are creating a new rule, click Save as New.
If you are modifying and/or activating a pre-configured rule, click Exit Menu.
After the rule is activated, it executes (that is, produces a list of rule matches) on a nightly basis after clinic hours. The rules does not automatically execute as soon as you save it.
Tip: You can manually run a rule (that is, produce a list of rule matches) at any time. In the Open Saved Search or Rule window, select the rule you want to run, and then click Open Selected. In the Practice Search window, click Execute the Rule Engine![]() .
.
When you execute a rule, it can take a long time to complete, and as the rule is being executed, Wolf EMR may slow down for you and other clinic users. For this reason, it is recommended that you execute rules after clinic hours.
© 2018 ![]()