Adding bookmarks to SMART forms
You can use bookmarks to automatically pull up-to-date data from the patient chart into a SMART form. Bookmarks are characters or a code that gets replaced with the corresponding patient data once the form is inserted into a patient's chart. For example, bookmarks can automatically pull in the patient's demographics, lab results, allergies, medications, and vaccinations into a form letter or a requisition.
For a list of all available bookmarks, see Bookmarks.
Best practice: Copy and paste the bookmark names from the help into your SMART form to avoid typos.
You edit SMART forms in Microsoft word from your clinic's Wolf EMR templates folder and insert the appropriate bookmark name.
Using the same bookmark multiple times in the same SMART form
To add more than one of the same bookmark, add a number at the end of a bookmark. For example, to include the consultant name twice within a Word template, insert the bookmarks ConsMDConsultant and ConsMDConsultant1.
Note: Before you can add bookmarks to SMART forms, you must enable Microsoft Word to show bookmarks. See Configuring Microsoft Word for SMART form development.
Steps
| 1. | In Windows Explorer, navigate to your SMART form templates folder. See Location of SMART form templates. |
| 2. | Open the SMART form template. |
| a) | On the Wolf EMR remote desktop, go into My Computer and navigate to the templates folder you identified in the above steps. |
| b) | Right-click the SMART form file you want to edit and choose Open. The document opens in Microsoft Word. |
Do not double-click the file to open it. Opening the file by double-clicking creates a new document using the original template and does not modify the template itself.
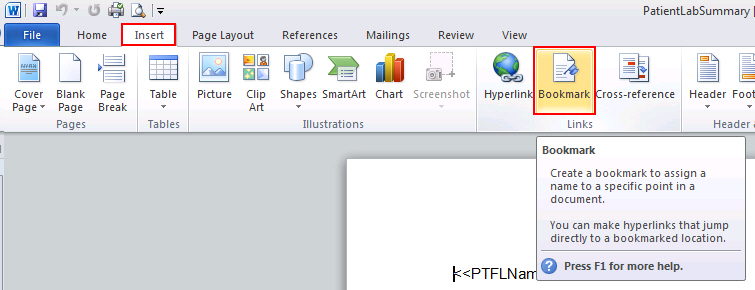
| 3. | Place your cursor in the document where you want to insert a bookmark |
| 4. | From the Insert menu, choose Bookmark. |
If the Bookmark button is not available in Microsoft Word:
| 1. | Enable the display of the Developer tab in Word. Choose File > Options > Customize Ribbon. In the right pane of the window, select the Developer check box and click OK. |
| 2. | Click the Developer tab > Restrict Editing > Stop Protection (at the bottom of the window). |
The Bookmark window opens with a list of available bookmarks.

| 3. | Do one of the following: |
Select a bookmark from the list.
Type the bookmark name and click the Add button to add it.
If you add a bookmark, it must come from one of the following:
A pre-configured Wolf EMR bookmark listed here: Bookmarks.
A built-in exam field. The bookmark name must match the name of the built-in exam field, with EX_ added at the beginning of the bookmark name. For example, to reference the built-in exam field of Murmur (from the Cardiac Follow up SOAP template, type the bookmark name as EX_Murmur.
A custom exam field that you added. The bookmark name must meet the following criteria:
Must not end with a digit.
Must include only letters, numbers, or underscores. Spaces and other characters are not supported.
Must match the name of the custom exam field with EXC_ added at the beginning of the bookmark name. For example, to reference the custom exam field of Symptom ABC, type the bookmark name as EXC_SymptomABC, excluding any spaces in the name of the custom exam field.
Must be 36 characters or less
To insert a bookmark more than one time in the same SMART form, add a number to the end of the bookmark. Each time you insert the bookmark, use a different number. For example, if you're inserting the ConsMDTitle bookmark a second time, use ConsMDTitle1 as the bookmark name. To insert the same bookmark again, use ConsMDTitle2.
| 4. | The Bookmark window closes and the bookmark is displayed in the document. |
The bookmark is entered in cryptic code. To see the name of a bookmark, click the ![]() character and select Insert > Bookmark. The Bookmark window opens with the bookmark highlighted in the list. Click Cancel in the Bookmark window.
character and select Insert > Bookmark. The Bookmark window opens with the bookmark highlighted in the list. Click Cancel in the Bookmark window.
If you do not see the ![]() character, in Word, choose File > Options > Advanced. In the Show document content section, select the Show bookmarks check box. See Configuring Microsoft Word for SMART form development.
character, in Word, choose File > Options > Advanced. In the Show document content section, select the Show bookmarks check box. See Configuring Microsoft Word for SMART form development.
| 5. | From the File menu, choose Save As and enter the following information: |
Save in: Click the drop-down arrow and locate your templates folder you identified above.
File name: Type the document name.
Save as type: Click the drop-down arrow and select Document Template (*.DOT).
| 6. | Click the Save button to save the document as a .DOT file in your templates folder. |
© 2018 ![]()