Registering patients for the patient portal
Registering patients for the patient portal
If the video does not play, to copy the web address and then paste it into a web browser outside the Wolf EMR data centre.
You can register any patient for the patient portal as long as they have an email address and birth date entered in Patient Maintenance:
You must register one patient at a time. When you register a patient, you choose which features the patient can access in the portal. For example, you can choose if a patient can book appointments online or send the clinic messages.
You can also register relations of a patient to access that patient’s patient portal. You must obtain legal consent from the patient to allow a relation to access the patient’s patient portal information. See Giving other people access to a patient’s data.
Best practice: Register a patient for the portal when they are in-person in your clinic.
Steps
| 1. | Open the Patient Maintenance window for the patient. |
| 2. | On the Name/Addr/Phone tab, in the Communication area, enter the patient's email address in the eMail field. |
Tip: When you add a new patient to Wolf EMR, be sure to record their email if they will likely use the patient portal (for example, patients with chronic diseases).
| 3. | Click Save  . . |
| 4. | Click the Other Demographics tab. The patient portal area appears on the right side of the window. |
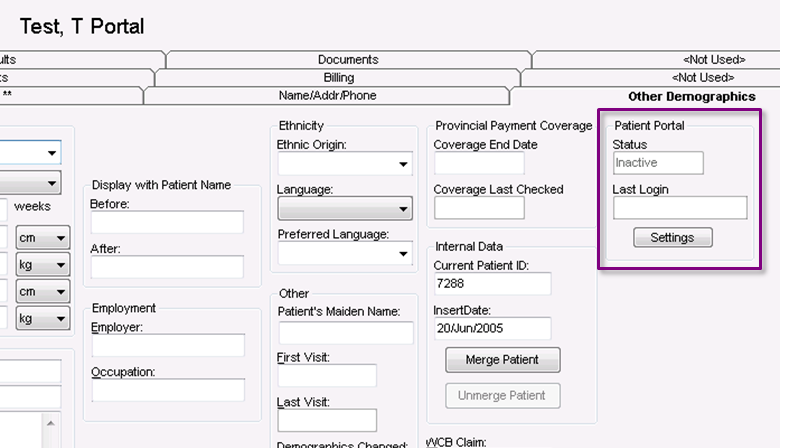
| 5. | In the patient portal area, click Settings. The Wolf patient portal Settings window opens. |
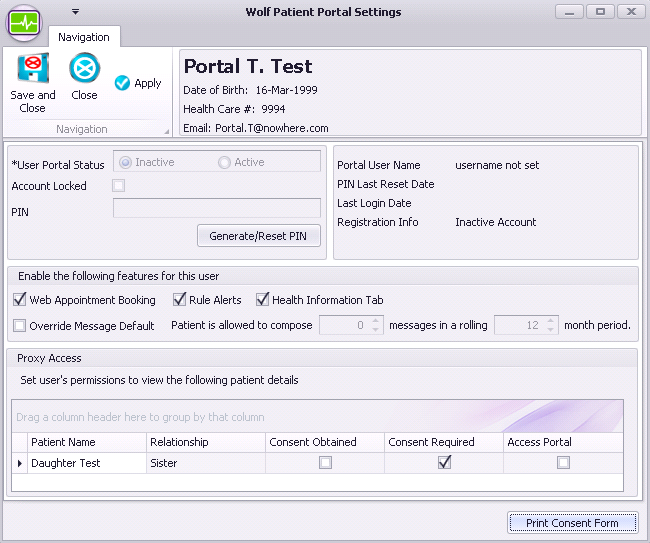
| 6. | In the Enable the following features for this user area, use the following table to select which features the patient can access in the patient portal. |
| Option | Description | |||||||||
|---|---|---|---|---|---|---|---|---|---|---|
|
Web Appointment Booking |
To enable the patient to book appointments online. |
|||||||||
|
Rule Alerts |
To enable the patient to receive automated notifications when they are flagged by a patient portal rule. |
|||||||||
|
Health Information Tab |
To enable the patient to view their health information (medical summary), |
|||||||||
|
Messaging |
If your clinic is enabled for patient portal messaging, by default all patients enrolled in the patient portal can send you messages. The number of messages patients can send over a defined number of months is generally set in your clinic’s patient portal configuration. See Configuring patient messaging. However, if you want this patient to be able to send more or fewer messages than your clinic default:
|
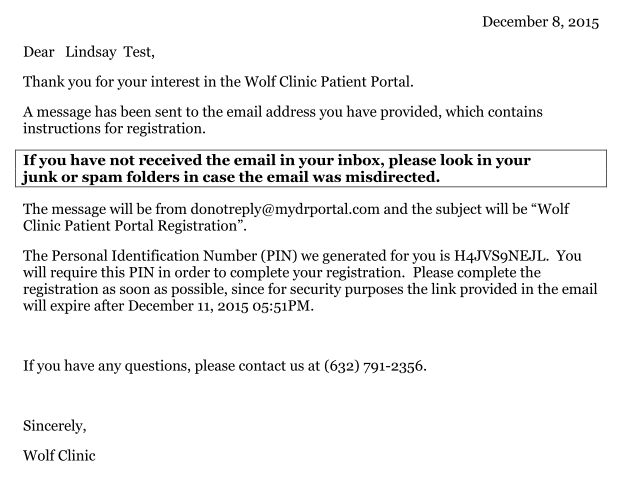
| 4. | Click Generate/Reset PIN. The EMR opens a PDF letter in the PDF-XChange Viewer. The body of the letter contains a message similar to the following example: |
The EMR also sends an email message to the patient similar to the following:
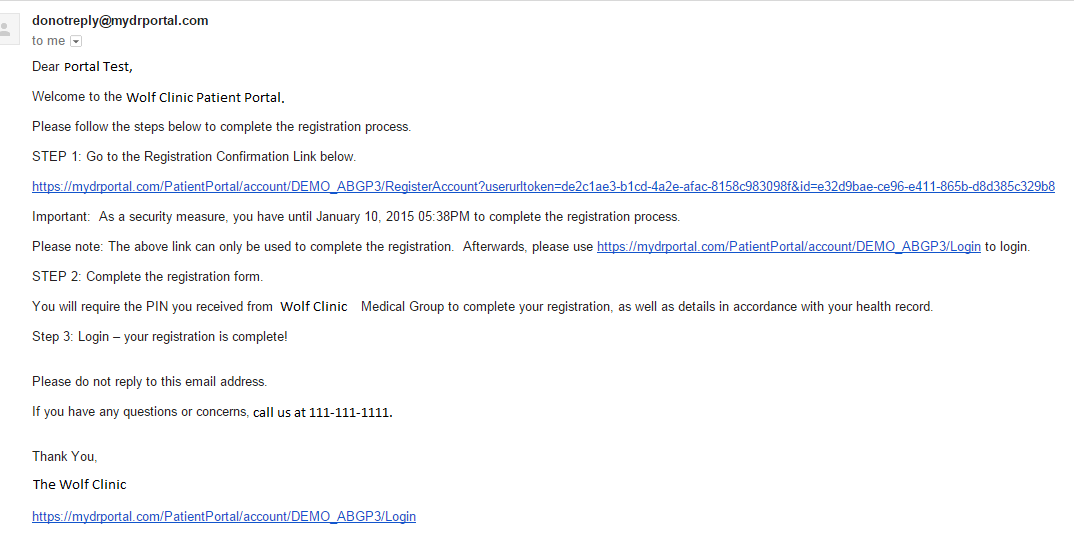
The patient needs both the printed letter and the email to sign up for the patient portal.
| 5. | To print the letter, in the PDF-XChange Viewer window, click Print  , or on your keyboard, press Ctrl+ P. , or on your keyboard, press Ctrl+ P. |
| 6. | Give the letter to the patient. The patient requires the Personal Identification Number (PIN) in the letter to sign up for the patient portal. |
Note: The portal user should be present in person to get their PIN. Avoid faxing or emailing the letter containing the PIN.
The PIN generated in the letter is valid for only a certain number of days and your clinic can configure this duration (see Configuring patient portal registration rules).
| 7. | On the Wolf patient portal Settings window, click Save and Close  . . |
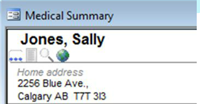
| 8. | Once the patient completes the registration process, the EMR displays a globe icon  in the patient’s SMART patient banner to indicate that the patient has a patient portal account. in the patient’s SMART patient banner to indicate that the patient has a patient portal account. |
© 2018 