Performing practice searches
Using a Wolf EMR practice search, you can perform a search that produces a report of patients (or a patient list) that match the search parameters. From the search report, you can perform a variety of actions for all or some of the patients in the list, such as:
Bill patients
Bulk-add a problem code to all patients in the list
Assign patients to another MD or change the patients' status
Before you can produce a search report, you first create a customized practice search that defines parameters patients must meet to display on the report (see Creating new practice searches). You can also use any of the Wolf EMR pre-configured practice searches for common groups of chronic disease or complex care patients, such as diabetes, hypertension, COPR and CHF (see a full list in Practice searches).
If the search parameters for a pre-configured practice search do not meet your needs, you can modify the search parameters before you produce a report.
You can also view the search results as a pie chart, broken down by various demographic factors.
Steps
| 1. | From the Wolf EMR home page, click Practice Search |
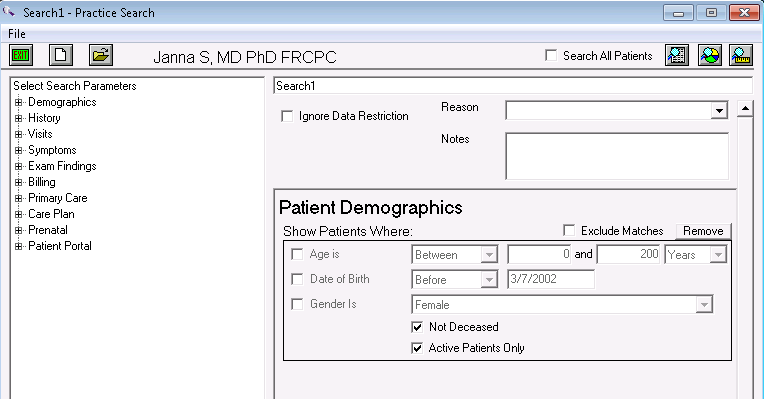
| 2. | Perform one of the following actions: |
To create a search, produce a practice search that defines the parameters patients must meet to display on the report. See Creating new practice searches
To use a pre-configured search:
| a) | Click Open a Previously Saved Search |
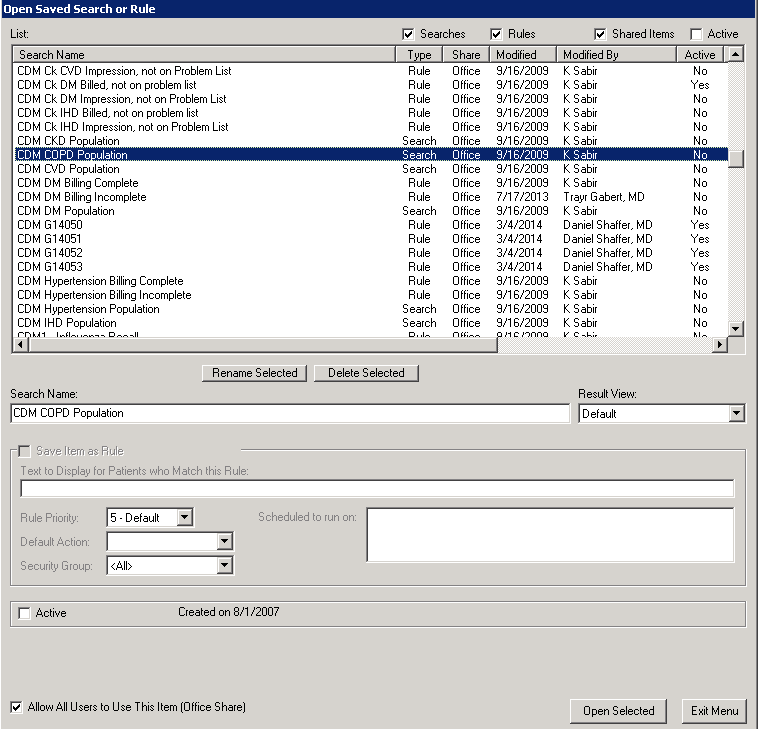
| b) | Click the search you want to use, and then click Open Selected. The Practice Search window opens for the selected search. |
Note: If you are using a TELUS Health-provided practice search that is configured to pull groups of chronic disease or complex care patients, look for practice searches that start with CDM (such as CDM Hypertension Population), or CC.
| c) | Modify the practice search parameters, if needed. |
| 3. | To produce a search report for all providers, at the top of the Practice Search window, select the Search All Patients check box. |
| 4. | Click Show Search Results as a Patient List |
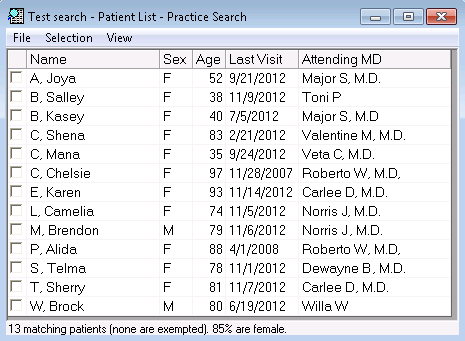
Tip: You can customize the columns that are in included in the report. See Configuring patient list columns.
To show the search results as a pie chart broken down by various demographic factors, click Show Search Results in the Demographic Viewer![]() .
.
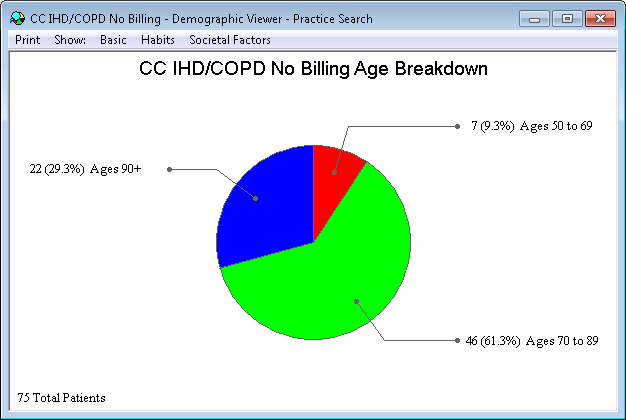
Use the menus at the top (Basic, Habits, Societal Factors) to change the demographic factors.
Double-click a pie slice to see the patient list.
| 5. | To perform an action, select the check box next to the patient(s) name (or to select all patients, from the Selection menu, choose Select all or press Ctrl+A on your keyboard) and choose one of the following actions. |
| To do this | Perform these actions |
|---|---|
| Bill a patient | Click the patient’s name and on your keyboard, press Ctrl + Shift + $. The EMR opens the billing window for the patient. |
| View the patient's medical summary | Right-click a patient and choose Medical Summary of press F7 on your keyboard |
| View the patient's demographic information | Right-click a patient and choose Patient Maintenance or press F9 on your keyboard. |
| Bulk-add a problem code |
View video tutorial: Using bulk-add in practice searches Bulk-adding a problem code to patients improves the quality of data in your EMR. For example, you can add the problem code for diabetes to all patients who were billed with a diagnostic code for diabetes. From the Selection menu, choose Problem List. |
| Create a follow-up or to-come-in task |
For example, you want to contact the patient to come in for their annual complex care plan review From the Selection menu, choose Add to Followup List or press Ctrl+F on your keyboard. |
| Assign a primary MD | From the Selection menu, choose Assign Primary MD or press Ctrl+M on your keyboard. |
| Assign an alternate MD | From the Selection menu, choose Assign Alternate MD. |
| Assign to a care team | From the Selection menu, choose Assign Care Team. |
| Create a SMART form for each selected patient |
The documents created in this procedure are not added to the patients' chart. They are intended for bulk communication and cannot be edited; they are sent directly to the specified printer. From the Selection menu, choose Send Selected to SMART Form. Select the SMART form to use, select the printer, and click Proceed with Merge. |
| Update the default location | From the Selection menu, choose Update Default Location. |
| Update the patient status | From the Selection menu, choose Update Patient Status. |
| Update patient status to Inactive | From the Selection menu, choose Deactivate Selected. |
| Add to patient lists |
See Adding groups of patients to lists using a practice search. |
| Schedule an appointment | On your keyboard, press Ctrl+T. |
| 6. | To export the list to a spreadsheet program, from the File menu, choose one of the following: |
Export All to CSV: Includes the patient name in the list. May be used for mail merges and other functions
Export All to CSV Anonymously: Includes the patient ID rather than the patient's name to keep anonymity. This is used for statistics and security.
© 2018 ![]()