Reviewing electronic investigation results and reports
When patients’ electronic investigations are imported into the EMR, providers are notified on their WorkDesk, where they can view and respond to the results. As you review investigation results, you can:
Access a patient’s medical summary (chart)
Graph numeric results
Add notes, or “append”, to a result or report
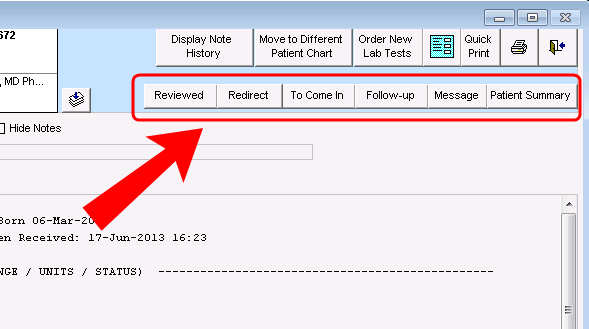
After you review a new electronic investigation result or report, you can choose to:
Mark it as reviewed (“signed-off”)
Redirect it to another provider
Create a request for the patient To Come In
Create a Follow Up task
Create a Message
These options are not available for manually-entered or already reviewed results.
Steps
| 1. | Open the WorkDesk and then, in the blue notification banner at the top of the window, click <#> Investigations. |
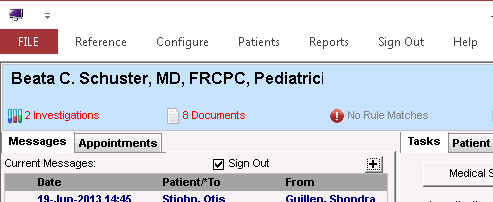
The Investigation/Document In Basket opens with:
Your un-reviewed investigations listed in the left column.
The first un-reviewed investigation displayed in the main area of the window.
Excelleris Transcription Reports
If your clinic is set up to receive Transcription Reports from Excelleris electronically, these reports display in the Electronic Investigations area. Once you view an Excelleris Transcription Report however, it is saved in the Documents area in the patient’s medical summary. See Printing investigations.
| 2. | To review investigations for another provider, in the Practitioner list, select the provider’s name. |
| 3. | To filter your list of investigation results, use the following table: |
| Filter selection | Results |
|---|---|
|
New (Default selection) |
Displays electronic investigations that were not reviewed. |
|
Corrected |
Displays electronic investigations flagged as corrections to previously received investigations. |
|
Abnormal |
Displays electronic investigations flagged as abnormal. |
|
Date |
Displays electronic investigations for a particular date. Enter a date, OR click |
|
Include Excelleris Test Reports |
Displays reports received from Excelleris. |
|
Patient |
Displays electronic investigations for a particular patient. Search for a patient using the Patient Search window, OR select a patient name from your list of electronic investigations. |
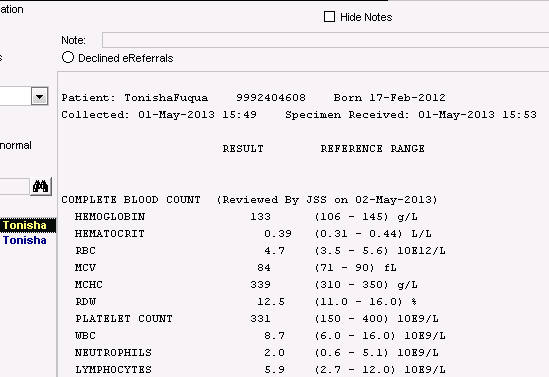
| 4. | To view result details, in the list of investigation results, click the patient’s name. The EMR displays the investigation on the right side of the window, with the patient’s SMART patient banner at the top of the window. |
| 5. | To view the patient’s medical summary, click the SMART patient banner. The EMR opens the patient’s medical summary. |
| 6. | To simplify your view of a result, at the top of the Investigation/Document In Basket window, select the Hide Notes check box. The EMR hides the investigation notes. |
| 7. | If the result contains a blue URL link, click the link. The EMR opens the link in your default browser. |
If you want to open the link in another browser (that is not currently set as your default browser), copy and paste the link into the browser you want:
| 1. | Highlight the link and then, on your keyboard, press Ctrl + C to copy the link. |
| 2. | Open the browser you want. |
| 3. | Click the address field, and then press Ctrl + V to paste the link. |
| 4. | To add notes to the investigation, at the top of the displayed investigation, in the Note field, enter your notes. |
| 5. | To view and print a running list of a patient’s previous results for a particular test, click a numeric result, and then click Patient Summary. The EMR opens the patient’s previous and current results in Microsoft Word. |
| 6. | To view a graph of a numeric result, double-click the result. See Graphing investigation results. |
Note: If the selected value is an INR, the results display in the Anticoagulation Summary Sheet. This way, you can manage a patient’s anticoagulation medication changes right away. See Viewing the Anticoagulation Summary Sheet.
| 7. | Respond to the investigation result. Using the following table, on the top right corner of the Investigation/Document In Basket window, choose an option. |
| Option | Scenario(s) | When you choose this option... | ||||||
|---|---|---|---|---|---|---|---|---|
|
Reviewed |
Result is normal. You are CCed on a result pertaining to a patient who belongs to a provider from another clinic. |
The investigation no longer displays as “new” in your Investigation/Document In Basket. |
||||||
|
Redirect |
Result pertains to a patient belonging to another provider in your clinic. |
Select the provider you want to redirect the investigation to, and then click OK. The EMR: Moves the investigation to another provider’s Investigation/Document In Basket and removes it from yours. Populates the investigation Note field with the following message: “Redirected by <your name> on <date>.” Note: You can only redirect labs to providers who are set up to receive labs in Wolf EMR. |
||||||
|
To Come In |
A patient has an abnormal result. You want to notify your staff to call-back the patient, and simultaneously create a reminder to yourself to discuss the result during the patient’s next visit. |
Both you AND your front end staff receive notifications to follow up with the patient:
On the SMART Banner of the patient’s medical record there is an indication that the patient has an outstanding follow-up item. The investigation no longer displays as “new” in your Investigation/Document In Basket. |
||||||
|
Follow up |
A patient has an abnormal result, however, you know that the patient already has an appointment booked tomorrow. You want to remind yourself to discuss the result, but do not need to notify your front end staff to call-back the patient. |
A follow-up item displays on your’s or another user’s follow-up list depending on who you assign the Follow-up to. Investigation no longer displays as “new” in your Investigation/Document In Basket. |
||||||
|
Message |
You want to talk to a colleague about the result before you act on it. |
A message displays on either yours or another user’s message list depending on who you send the message to. The investigation no longer displays as “new” in your Investigation/Document In Basket. For more information on how to use and modify messages and tasks, see Messages and tasks. |
Tip: If the options for Reviewed, Redirect, To Come In, Follow Up, or Message do not display, the results were already reviewed or were manually entered.
| 3. | After you finish viewing and responding to your electronic investigation results and documents, click Save & Close |
If you mark an investigation as reviewed by mistake, you can “bring it back” by creating a message or follow-up for yourself:
| 1. | In the filter list area of the Investigation/Document In Basket window, clear the New check box. |
| 2. | Select the Date check box, and then enter the date that the investigation came in on. The EMR displays all reviewed and un-reviewed investigations for the selected date. |
| 3. | Click the investigation. The investigation’s results displays in the main area. |
| 4. | Right-click the investigation’s results and choose New Message, or New Follow-up. |
© 2018 ![]()