Managing new patients added with investigation imports
If new patients are added with an investigation import (for example, if you receive labs for patients seen by a provider in hospital), from the import history, you can:
Modify patient demographic information
Deactivate the patients
Assign the patients to a primary MD
Assign the patients to a specific clinic location
Assign the patients to a care team
Change the patients’ status
Create follow-up tasks for the patients
Print a list of added patients
If the new patient that was added does not belong to your clinic and the test results were misdirected, contact the sending lab company to notify them. You can then mark the newly added patient as “inactive” since they do not belong to your clinic (Patient Maintenance > Patient Status tab > New Status > choose Left Practice and enter a date and a note stating that the patient was added due to a misdirected investigation).
Steps
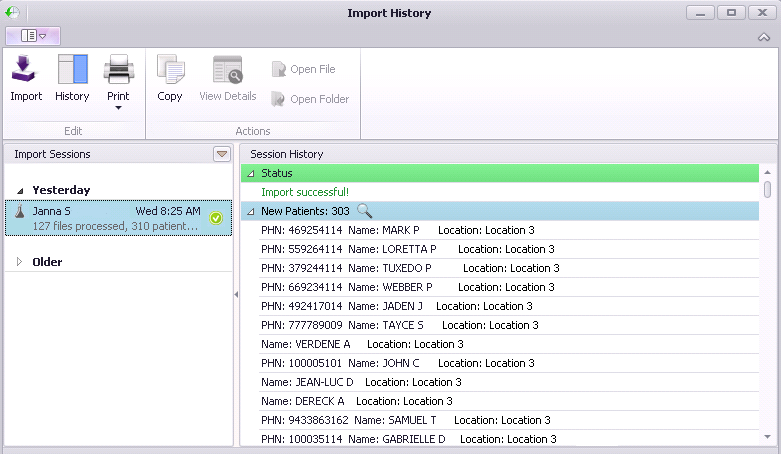
| 1. | Open the Import History window, see Importing electronic investigations and reports. |
| 2. | In the Import Session area, click the import you want to view and manage new patients for. The EMR displays a list of patients added to your system with the import. The list includes each patient’s: |
Name
Provincial health number
Clinic location the investigation was ordered from (displays only if your clinic has multiple clinic locations)
| 3. | To view or modify a patient’s demographic information, double-click the patient’s name. The EMR opens the Patient Maintenance window. |
| 4. | To modify or deactivate the imported patients as a group: |
| a) | In the Session History area, on the New Patients header, click  . The EMR opens a window displaying the list of new patients. . The EMR opens a window displaying the list of new patients. |
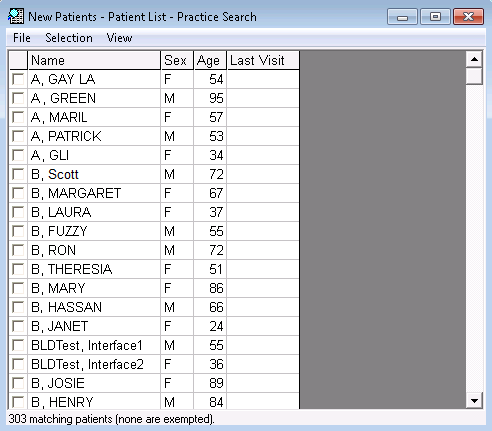
| b) | Select the patients you want to modify or deactivate, or to select all patients, choose Selection > Select All. |
| c) | In the patient list menu, click Selection. The EMR displays a list of actions you can perform on the selected patients. |
| d) | Using the following table, select an action to perform on the patients. |
| To do this... | Follow these steps.. | |||||||||
|---|---|---|---|---|---|---|---|---|---|---|
|
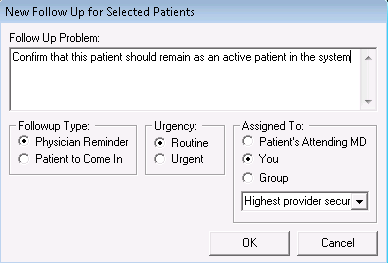
Create a follow-up task for the patient(s) |
Follow Up Problem: Enter a description for the follow up task. Follow up Type: To assign the follow task(s) to a particular user or to a group, click Physician Reminder, or to create a to Come In task, click Patient to Come In. Urgency Assigned To: Select the user or group the task(s) are to be assigned to. For more information aboutTo Come In (TCI) tasks, see Creating To Come In (TCI) tasks. |
|||||||||
|
Assign the patient(s) a primary provider |
Select Assign Primary MD. |
|||||||||
|
Assign the patient(s) to a care team |
Select Assign Care Team. Note: You can perform this action only if your clinic has care teams set up in Wolf EMR. |
|||||||||
|
Assign the patient(s) to a clinic location |
Select Update Default Location. Note: You can perform this action only if your clinic has multiple locations set up in Wolf EMR. By default, patient’s are assigned to the location that their investigations were ordered from. |
|||||||||
|
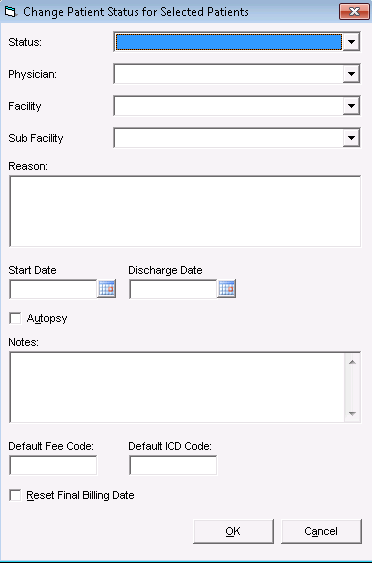
Update the patients’ status |
Note: The information required depends on the status you select. Note: If the status you want is not available on the list, a user with administrator authority can add statuses as needed. |
|||||||||
|
Deactivate the patients |
Select Deactivate Selected. |
| 4. | To print a list of new patients added during the import, on the ribbon bar, click Print > Print New Patients. |
© 2018 ![]()