Importing electronic investigations and reports
You can import electronic laboratory results and other medical reports for all providers in your clinic at once. The types of labs and reports that you can import depends on the electronic feeds your clinic has set up. Once imported, providers can review and take action on the investigations.
Assign one or more specific user(s) in your clinic to import lab investigations.
To receive the most up-to-date results, perform an import three times a day. If you miss one or more download times, Wolf EMR imports all electronic investigations released since the last import.
Any Wolf EMR user can download electronic investigations, no matter their role or security access. However, each user who downloads investigations must be configured to do so. Only investigations for which the user has access to are imported.
Steps
| 1. | On the Wolf EMR home page, click Import |
| 2. | When prompted “Are you sure you would like to import new investigations at this time?”, click Yes. |
| 3. | The EMR imports investigation results and reports from all companies you are set up to receive electronic feeds from, and displays a summary of the imported investigations in the Import History window. |
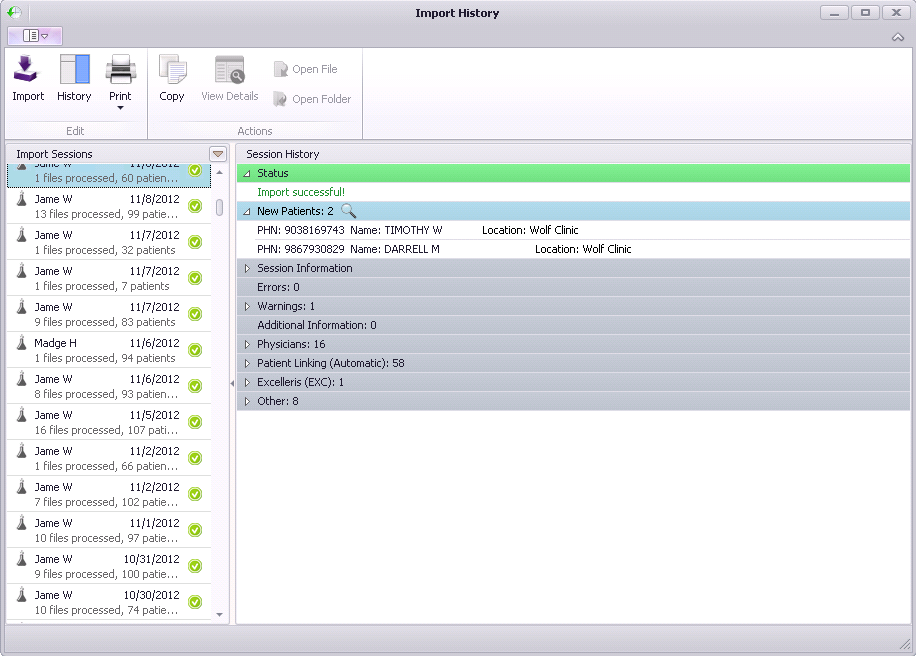
The Import History window contains the following information:
Import Sessions: Each import is a “session”. A running list of users who have imported investigations, and the dates and times those imports occurred.
Session History: A status summary of your imports. Indicates if the current import is successful, and the total number of investigations imported. Also details information on new patients added with the most recent investigation import, including patient names, provincial health numbers, and clinic location (if your clinic has more than one clinic location).
| 4. | If an investigation from the import belongs to a patient who cannot be identified in your system, the EMR opens the Patient Match Selection Form window with a list of possible matches. |
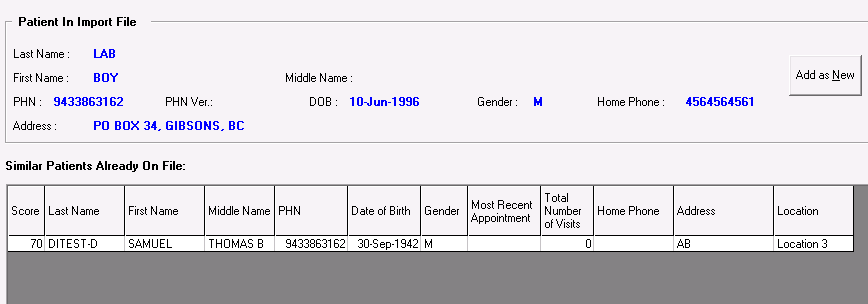
Perform one of the following actions:
If the investigation matches to a patient in the list, in the Similar Patient Already On File list, double-click the patient’s name.
If none of the patients are a match, click Add as New to add the new patient in your system.
Note: If your clinic has multiple clinic locations, the patient is automatically assigned to the ordering physician’s primary location. You can manually assign imported patients to another location if needed. See Managing new patients added with investigation imports.
Once all unidentified patients are matched, the EMR displays the Import History window once more.
| 5. | In the Session History area of the Import History window, review the status of your import to see whether your import was successful. |
Note: If there are any errors, contact the Wolf EMR support team for assistance.
Viewing investigation import information for multiple locations:
If your clinic has multiple locations, by default you see investigation import information only for locations that you are assigned to.
To view import information for all clinic locations, beside the Import Session header, click the down arrow ![]() and then, in the list of filter options, click Show All Sessions.
and then, in the list of filter options, click Show All Sessions.

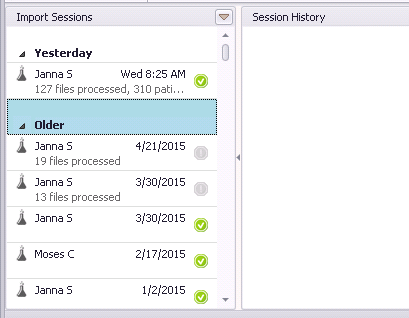
| 6. | To view detailed information for a previous import, in the Import Sessions area, click the import. Details on the selected import displays in the Session History area. |
If the import you want is not available in the list, click the arrow to the left of Older. The EMR displays a list of previous imports.
| 7. | To expand the Session History area, click History |
| 8. | To display the Import Sessions area, click History |
| 9. | When you finish reviewing the status of your import, click Close |
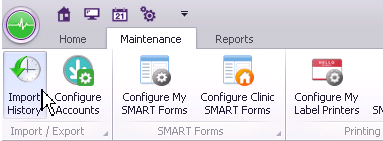
If you want to view the import history without importing investigations, you can access the Import History window from Wolf EMR Maintenance:
On the Wolf EMR home page, select the Maintenance tab, and then click Import History.
© 2018 ![]()