Managing SOAP templates
You can create or edit SOAP templates to best suit your practice needs. You can then access these templates via SOAP notes use them for creating your encounter information.
You can also copy one SOAP template to modify for a different provider.
Steps
| 1. | From the WorkDesk menu, choose Configure > SOAP Template Manager. The Template Manager window opens. |
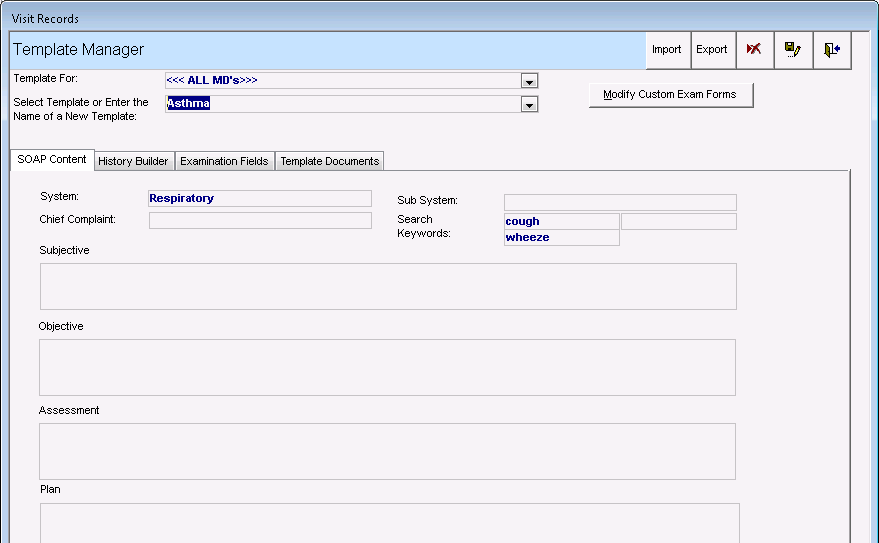
| 2. | In the Template For list, select the provider who can access the template. Choose <<All MDs>> for templates available to all providers in the clinic. |
| 3. | In the Select template, or enter the name of a new template field, choose an existing template to edit or type the name of a new template. |
Tip: To copy a template from one provider and reuse and edit it for another provider, after you choose a template top copy in the above steps, in the Template For list, select the provider for whom you want to make a copy for.
In the Select template, or enter the name of a new template field, type a unique name for the template and then click the Save Template button ![]() .
.
| 4. | On the SOAP Content tab, use the following table to enter information for the Subjective, Objective, Assessment and Plan sections that you can then use as default information when first opening the template. |
| Field | Description |
|---|---|
|
System |
Enter the system that this template addresses. The text entered here acts as a keyword when searching for templates. |
|
Sub System |
Enter the sub system that this template addresses. The text entered here acts as a keyword when searching for templates. |
|
Search Keywords |
Optionally, enter additional keywords to facilitate finding this template. |
|
Chief Complaint |
Enter the chief complaint that is entered by default when the template is selected. |
|
Subjective, Objective, Assessment, Plan |
Enter the default information that appears if users answers Yes to the question: “Used stored template values to fill out visit record?” when first opening the template for a visit record. |
| 5. | On the History Builder tab, view, add or modify the list of symptoms that displays in the template. Click Add History Element to the following Template to copy the selected symptoms to the selected template. |
Tip: Click the name of the template above the list of symptoms to edit the list of symptoms (see also Customizing the subjective history builder).
| 6. | On the Examination Fields tab, select an exam template to associate with the SOAP template. You cannot modify the fields of the exam template. |
| 7. | On the Template Documents Fields tab, optionally link documents and websites to the SOAP template. The documents listed were linked to a problem as a resource. The websites listed were saved as TemplateDocuments when configuring internet favourites (see Configuring your clinic’s internet favourites). |
To link a document or a website, select it in the list on the left and click Add to Linked.
To link a SMART form, click Add SMART Form, select the form, and click Attach to Template.
These linked references will appear in the SOAP template when users click the Template Documents link in the PLAN section.
© 2018 ![]()