Enabling specific days and time slots for online booking
On your clinic’s appointment schedule, you can select what time slots your patients can book online. For example, you can choose to allow online appointment bookings only for times slots where your clinic typically sees fewer walk-in patients and is less busy.
Tip: To encourage your patients to book their appointments online, consider making as many of your appointment slots “web bookable” as possible. This will make it easier for patients to find appointment times that work for them.
Steps
| 1. | Create scheduling time types that are defined as “web bookable” (see Creating “web-bookable” schedule time types). |
| 2. | Apply the “web bookable” time types to a provider’s schedule, or to all providers’ schedules at once in the Time Definition Maintenance window. |
| 3. | To enable specific days and or time slots for online booking: |
| 4. | From the Appointment Scheduler menu, choose Configure > Physician and Clinic Hours (Schedule Setup). The Time Definition Maintenance window opens. |
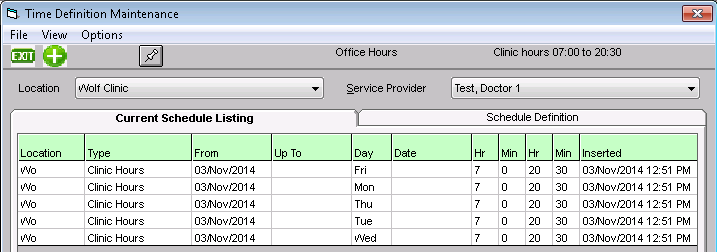
| 5. | If your clinic has multiple locations, in the Location list click the location you are enabling online appointments for. |
Tip: To enable online appointments for the same time slots for all locations, choose <All>.
| 6. | In the Service Provider list, choose the provider you want to enable online appointments for. |
Tip: To enable online appointments for the same time slots for all providers, choose <Entire Office>.
| 7. | At the top of the window, click New |
| 8. | Using the following table, enter information for the web bookable time. |
| Entry label | Instructions |
|---|---|
|
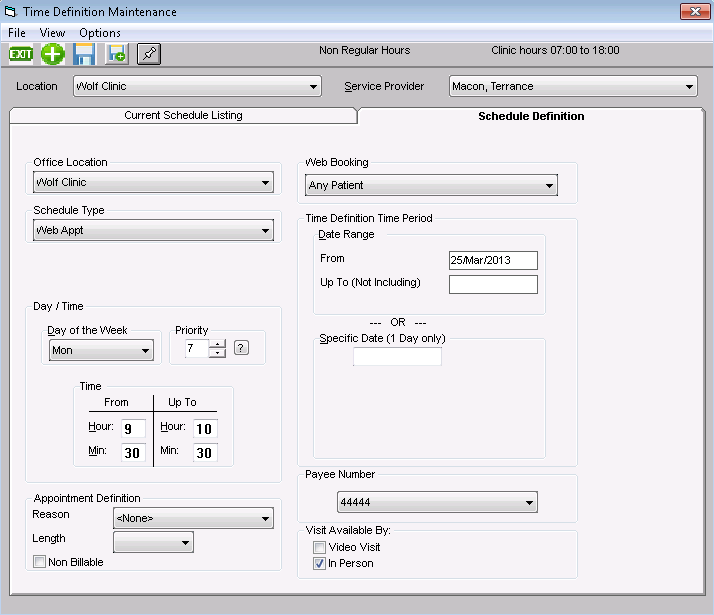
Schedule Type |
In the list, click a schedule time type that is configured to be “web bookable”. See Enabling specific types of appointments to be booked online. |
|
Day of the Week |
To input a time definition for each day of the week individually, click a day of the week. For example, Monday. To input a time definition all days of the week at once, click <All>. |
|
Web Booking |
In the list, select what patients can book appointments with this provider. |
|
Time |
In the From and Up To fields, enter the start and end times for web-bookable time slots for the day selected (or for the week, if <All> is selected).
For example, if you only want web-bookable appointments starting from 1 PM with the last web-bookable appointment ending at 3 PM, then enter 1 in the From Hour field and 00 in the From Min field, and then enter 15 in the Up to Hour field and 00 in the Up to Min field. |
|
Priority |
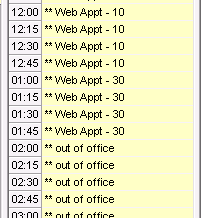
In the Priority field enter the priority level for the time definition. The priority determines what layer on the schedule the time definition displays. The larger the priority number, the lower the layer on the appointment schedule. 9 = lowest layer (displays behind all other layers) 1 = highest layer (displays in front of all other layers) Recommendation: For setting web-bookable time definitions set the priority to be a higher than the number you use for holidays, and provider Out of Office time definitions. A priority of 6 or 7 is used most often for web-bookable appointments. Important: Appointment slots are only web bookable if a web-bookable Time Type is visible on the schedule. If you “hide” a web-bookable Time Type with another Time Type, for example, “Out of Office”, then that appointment slot is no longer web-bookable.
|
|
Appointment Definition |
In the Reason list, choose the default appointment reason to display on appointments booked in these time slots. For example, the appointment reason can default to Office Visit – Online. Note: Choose an appointment reason that is configured to “display in web appointment reasons”. See Enabling specific types of appointments to be booked online. In the Length list, click the default length for appointments booked on these time slots. |
|
Time Definition Time Period |
In the From and Up To (Not including) fields, enter the date range you want the hours you defined to be in effect. Note: The From field defaults to today’s date. If you leave the Up To field blank, the time definition remains on the provider(s) schedule indefinitely. |

| 9. | Click Save |
| 10. | If you are adding time definitions for each day of the week individually, repeat these steps for each day of the week. |
| 11. | When you are done, click Close |
© 2018 ![]()