Managing the Patients To Notify list
The Patients To Notify list contains a list of patients that front-end staff need to notify for a follow-up appointment or a referral. This list includes patients with:
To Come in (TCI) follow-ups
Referrals with appointment dates
Steps
| 1. | On your WorkDesk, in the Clinical Queues area, click <#> patients to notify (where # = the number of patients to notify for follow-up appointments). The Patients To Notify window opens. |
| 2. | To view only a particular provider’s patients, in the Practitioner list, choose a name. |
| 3. | In the Type list, choose one of the following options to filter the type of items in the list: |
All: Both follow-ups and referrals.
Referral: Only referrals.
Clinic (default): Only follow-up tasks.
| 4. | In the Group By area, choose one of the following: |
Priority (default): Patients listed by the urgency of the follow-up or referral.
Patient: Patients listed in alphabetical order by last name.
| 5. | In the left pane, click a patient. The Follow Up Notification or Referral Notification appears on the right. |
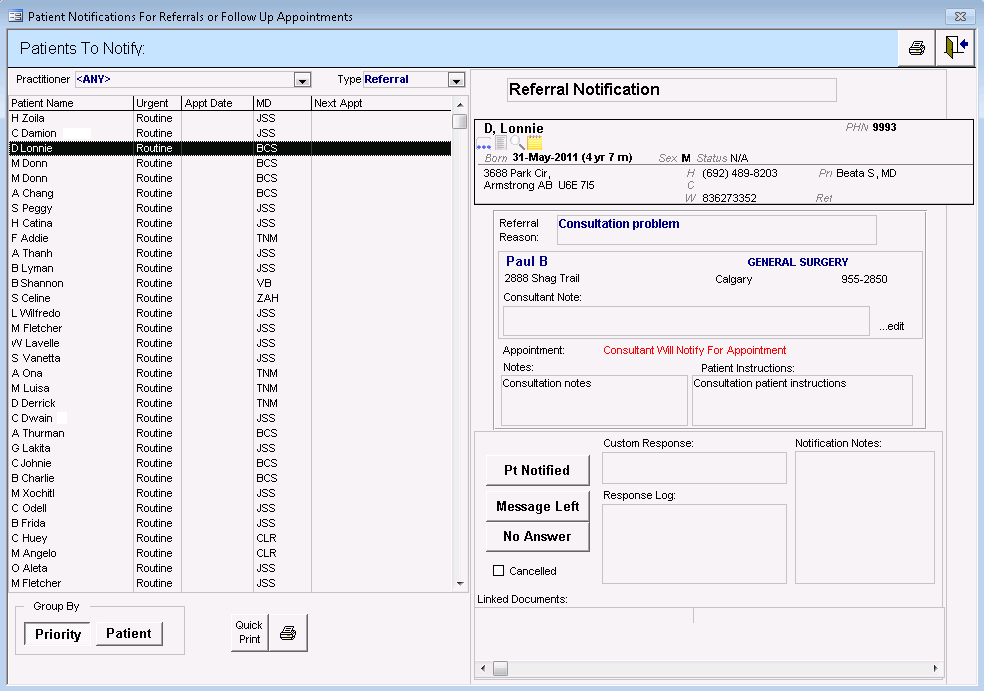
| 6. | Use the following table to enter information into the Response Log: |
| Field | Description |
|---|---|
|
Pt Notified |
Click to indicate that you notified the patient. The EMR adds the following information to the response log: Patient Notified (<your name>/MM/DDD/YYYY HH:MM). After you close the Patients To Notify list, the patient is removed from the list. |
|
Message Left |
Click to indicate that you called the patient and left a message. The EMR adds the following information to the response log: Message Left (<your name>/MM/DDD/YYYY HH:MM). |
|
No Answer |
Click to indicate that you called the patient, but there was no answer. The EMR adds the following information to the response log: No Answer (<your name>/MM/DDD/YYYY HH:MM). |
|
Custom Response |
Type a custom response specific to this patient. |
|
Notification Log |
Type any additional notes. |
Note: If the notification was entered by mistake, select the Cancelled check box. After you close the Patients To Notify window, the EMR removes the patient from the list.
| 7. | To book an appointment for the selected patient: |
| a) | In the Follow Up Notification area, click Book Appointment. The Appointment Scheduler opens with the patient’s name selected in the Patient Search area. |
| b) | Book the patient for an appointment. See Patient lists (waiting lists). |
| 8. | To remove a patient from the Patients to Notify list: |
| a) | In the Follow Up Tasks area on your Workdesk, double-click the follow-up you want to remove from your Patients To Notify list. The Follow-up List window with the follow-up displayed on the right. |
| b) | If you contacted the patient, select the Patient Notified check box. |
| c) | If the patient was added to the list in error, select the Cancelled check box. |
The EMR removes the patient from your Patients To Notify list.
| 9. | Click Save & Close |
© 2018 ![]()