Entering historical vitals
Recorded webinar: Vitals entry functionality (33:28)
If the video does not play, to copy the web address and then paste it into a web browser outside the Wolf EMR data centre.
You can easily enter multiple historical vitals at once. For example, a patient may provide a set of vitals that they captured over the course of several days or weeks. Or, you may receive a set of vitals from a consultant’s letter.
There is no encounter associated with these readings.
To print a report of the historical vitals, in the medical summary, click and choose the Print Vitals Historical option.
You can view entered historical vitals from the following windows in the EMR.
BMI Graph
Cardiac Risk
CDM Flowsheet & CDM Flowsheet Print
Consult Letter
Graph
Growth Chart
New Medication
Patient Banner
Practice search windows (Ad hoc search by Systolic BP, Diastolic BP, Height, Weight, and Most Recent Exam Findings Values)
Vital Signs History
Worksheet
Important: You CANNOT view historical vitals from the patient portal Timeline View.
All historical vitals that you enter are included in graphs and flowsheets, and you can use historical vitals in practice searches.
You can configure the values that appear in the Source list, such as “home” or “hospital” (see Configuring historical vitals entry).
Steps
| 1. | From the WorkDesk, under Data Entry, click Historical Vitals and find the patient. The Historical Vitals window opens. |
Tip: You can also enter historical vitals from the right-click menu and from the Quick Entry Form (right-click and choose Quick Entry or click the Quick Entry button on the WorkDesk and choose the Historical Vitals tab).
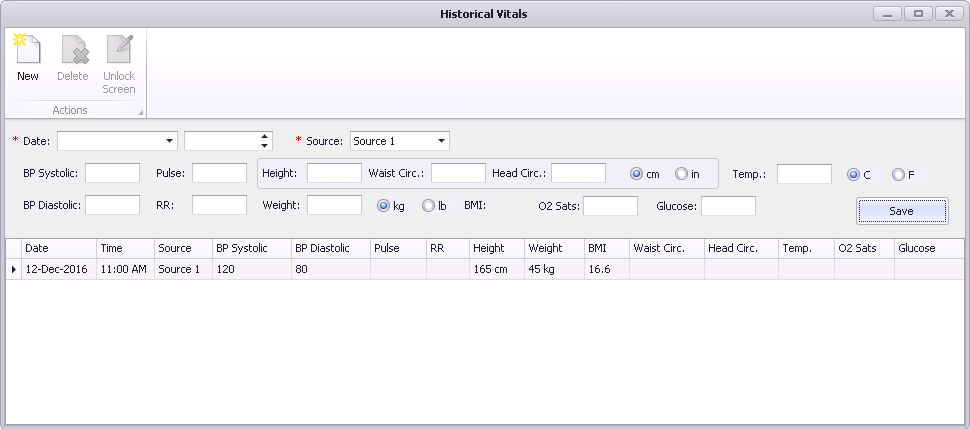
| 2. | Enter the date and source, and the captured vital(s). |
| 3. | Click Save. |
| 4. | If needed, enter another date’s vitals. |
| 5. | When you are done, close the window. |
© 2018 ![]()