Customizing structured exam templates
View video tutorial: Creating custom exam fields
You can create and customize custom exams to include only the fields that you require within SOAP notes. You can also create you own custom fields. A wizard walks you through the process.
Steps
|
1.
|
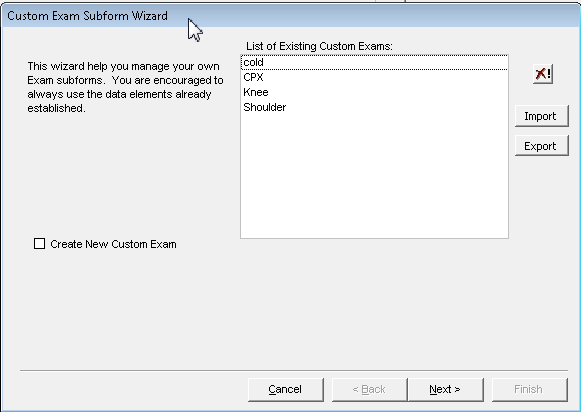
From the WorkDesk menu, choose Configure > Custom Exam Forms. The Custom Exam Subform Wizard opens. |
|
2.
|
To edit an existing exam, select it in the list. |
|
3.
|
To create a new custom exam, select the Create New Custom Exam check box and type a name (up to 49 characters including only letters, numbers, and/or spaces). |
|
5.
|
Select whether to Include Vitals. If you choose Yes, select the vitals that will be required in the exam. |
|
7.
|
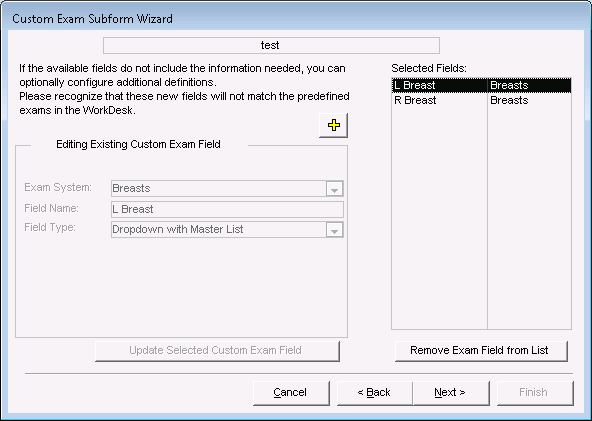
Select your desired exam system and part and click the right arrow > to move it to the Selected Fields list. Repeat for all the parts you need. Use the left arrow to remove a field. |
|
9.
|
If the available fields do not include the information you need, add additional custom exam fields: |
|
b)
|
Choose an exam system. |
|
c)
|
Type a name for the new field. Include only letters, numbers, and spaces. The name cannot end with a number and cannot exceed 36 characters. This is the name that will appear within the SOAP note. |
|
d)
|
Select the Field Type and enter the values. |
|
e)
|
Click Append New Custom Exam Field To List. |
The item appears in the Selected Fields with an @ symbol to indicate this is a custom field.
|
10.
|
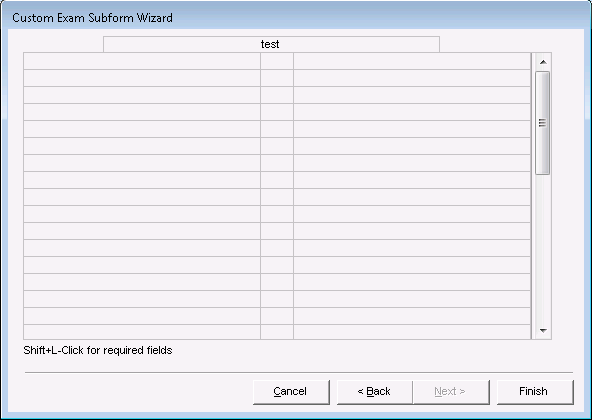
Click Next. A window with a seemingly empty table opens. |
|
11.
|
Specify the order and location for the fields to appear in the SOAP note: |
|
a)
|
Click a cell to display the list of the fields that you chose. |
|
b)
|
Click the field that you want to appear in the custom exam. |
|
c)
|
Click another cell in the table to place the next field. |
|
d)
|
Repeat until all your fields are placed within the two columns and in the order that you want them to appear. |
Your custom exam is now available to use from the EXAM list within the SOAP template.